DIY

DIY Farmhouse Coffee Table

Back in Meridian while Rob was on the weapons detachment, I knew that I needed a project to keep me busy.  While Blair and I were in Atlanta, I got a wild hair idea to build a coffee table for our living room.  I've never built furniture before but while we were walking through Ikea, I decided that I could buy a basic, cheap table and then fancy it up to match our style.  How hard could it be, right?!
 photo IMG_6408.jpg
The project turned out to be a much bigger one than I expected.  I initially thought I would just stain a few boards and use wood glue to adhere them to the table surface however building an actual tabletop turned out to be a much better idea in the long run.  Let's face it, this table is going to have to survive military movers - it had to be sturdy!  Although the workers at Lowe's had very little patience for me, you can truly learn anything on YouTube.  I watched numerous video tutorials on drill pocket holes and the kreg jig is now probably my favorite tool ever!
 photo IMG_6323.jpg
As for a tutorial, there are much better and more detailed ones out there on the internet than I could ever write.  I'm not great at following directions and since I don't really have carpentry skills, a lot of it was over my head.  That means when it came to this project, I kind of just winged it!  Luckily, it all turned out!
 photo IMG_6363.jpg
I used the Lack table from Ikea in white because I wanted to keep the legs white.  I built the top to fit the table (no real directions on the building part: I just cut the pieces to fit and drilled pocket holes everywhere to hook everything together!) and then stained it using Minwax Classic Gray and Walnut (letting the stain sit for 10 minutes then wiping with a rag and letting dry between coats).
 photo acc72ebd-264b-4c9a-aab6-c4a3432c6597.jpg
Considering the price of (albeit gorgeous!) coffee tables from Restoration Hardware or Pottery Barn, this baby was a steal.  It also kept me busy and gave me something to brag about accomplishing when Rob came home from the DET.  Win-win!  Plus it survived the move to Beaufort without a scratch!
Back in Meridian while Rob was on the weapons detachment, I knew that I needed a project to keep me busy.  While Blair and I were in Atlanta, I got a wild hair idea to build a coffee table for our living room.  I've never built furniture before but while we were walking through Ikea, I decided that I could buy a basic, cheap table and then fancy it up to match our style.  How hard could it be, right?!
 photo IMG_6408.jpg
The project turned out to be a much bigger one than I expected.  I initially thought I would just stain a few boards and use wood glue to adhere them to the table surface however building an actual tabletop turned out to be a much better idea in the long run.  Let's face it, this table is going to have to survive military movers - it had to be sturdy!  Although the workers at Lowe's had very little patience for me, you can truly learn anything on YouTube.  I watched numerous video tutorials on drill pocket holes and the kreg jig is now probably my favorite tool ever!
 photo IMG_6323.jpg
As for a tutorial, there are much better and more detailed ones out there on the internet than I could ever write.  I'm not great at following directions and since I don't really have carpentry skills, a lot of it was over my head.  That means when it came to this project, I kind of just winged it!  Luckily, it all turned out!
 photo IMG_6363.jpg
I used the Lack table from Ikea in white because I wanted to keep the legs white.  I built the top to fit the table (no real directions on the building part: I just cut the pieces to fit and drilled pocket holes everywhere to hook everything together!) and then stained it using Minwax Classic Gray and Walnut (letting the stain sit for 10 minutes then wiping with a rag and letting dry between coats).
 photo acc72ebd-264b-4c9a-aab6-c4a3432c6597.jpg
Considering the price of (albeit gorgeous!) coffee tables from Restoration Hardware or Pottery Barn, this baby was a steal.  It also kept me busy and gave me something to brag about accomplishing when Rob came home from the DET.  Win-win!  Plus it survived the move to Beaufort without a scratch!

DIY Farmhouse Coffee Table

DIY Outdoor Pallet Bar

I think I've been pinning pallet projects for the last three years and FINALLY got my hands on a couple pallets and got working!  I thought it was going to be tough to decide what to complete but after scrolling through my pins, there was one project that absolutely stood out: the outdoor pallet bar!
DIY Outdoor Pallet Bar
We are completely fascinated by our little backyard and love to eat outside, have bonfires, and take any excuse to spend time back there.  While some people might not understand our love affair with our tiny slab of fenced in concrete, this is our first backyard and we love it!  I knew this bar would be perfect for our space, and practical!  It was a simple first pallet project and I'm really happy with how it turned out.  I am definitely not a pro and will probably get all the technical names for things wrong but here is how we made our pallet bar!
Image and video hosting by TinyPic
how to make a bar out of pallets
Materials:
2 Pallets
Sander + Sand paper
Paint, Stain, Primer in your desired colors
Zip Ties
1 Wooden Plank (Cut down to 50 x 12 x 2)
3 inch Wood Screws

Directions:
1.  Sand down both pallets until smooth.  They don't have to be perfect but you don't want jagged edges or anything that will cut someone or give you a splinter.
2.  Stain the pallets.  I did the first coat in a super dark brown, waited 24 hours and then used a lighter brown as the second coat, going heavier on some planks than others to give it a varied, rustic look.  Make sure to get all of the sides, edges, and insides as you can see a lot of the pallets.
3.  Paint your top wood plank.  (Our wood plank was finished so it didn't need to be sanded)
4.  Ziptie your pallets together and choose the side you would like to be the "front".  Ziptie the pallets to your fence/wall/whatever accordingly for extra support
5.  Place the board on top and screw on to pallets.  (We screwed it from the underneath to keep the surface completely in tact with no holes)
Image and video hosting by TinyPic
I think I've been pinning pallet projects for the last three years and FINALLY got my hands on a couple pallets and got working!  I thought it was going to be tough to decide what to complete but after scrolling through my pins, there was one project that absolutely stood out: the outdoor pallet bar!
DIY Outdoor Pallet Bar
We are completely fascinated by our little backyard and love to eat outside, have bonfires, and take any excuse to spend time back there.  While some people might not understand our love affair with our tiny slab of fenced in concrete, this is our first backyard and we love it!  I knew this bar would be perfect for our space, and practical!  It was a simple first pallet project and I'm really happy with how it turned out.  I am definitely not a pro and will probably get all the technical names for things wrong but here is how we made our pallet bar!
Image and video hosting by TinyPic
how to make a bar out of pallets
Materials:
2 Pallets
Sander + Sand paper
Paint, Stain, Primer in your desired colors
Zip Ties
1 Wooden Plank (Cut down to 50 x 12 x 2)
3 inch Wood Screws

Directions:
1.  Sand down both pallets until smooth.  They don't have to be perfect but you don't want jagged edges or anything that will cut someone or give you a splinter.
2.  Stain the pallets.  I did the first coat in a super dark brown, waited 24 hours and then used a lighter brown as the second coat, going heavier on some planks than others to give it a varied, rustic look.  Make sure to get all of the sides, edges, and insides as you can see a lot of the pallets.
3.  Paint your top wood plank.  (Our wood plank was finished so it didn't need to be sanded)
4.  Ziptie your pallets together and choose the side you would like to be the "front".  Ziptie the pallets to your fence/wall/whatever accordingly for extra support
5.  Place the board on top and screw on to pallets.  (We screwed it from the underneath to keep the surface completely in tact with no holes)
Image and video hosting by TinyPic

DIY Outdoor Pallet Bar

Gallery Wall

I love the fact that gallery walls are so popular.  This is one of my favorite trends and I never get sick of seeing them.  Why?  Because they are so specific to each person.  From the pictures to the knick-knacks, the layout to the style, every gallery wall is unique and representative of the family living in that home.  I love to see how people show their lives in their design and am always surprised at how creative people can be.
Gallery Wall :: Reddy Or Knot
I love when gallery walls match the personality of the owner and contain little snapshots of their lives.  I am definitely not an interior designer nor do I have my perfect Pinterest decor but it is our home and I want it filled with things we love.  Decorating a large space with a gallery wall is also great because it is fluid and can grow and change over time.  I am constantly thinking of what I want to add next and where I will put it.
Gallery Wall - reddyorknot.blogspot.com
Pensacola Gallery Wall
A little peek into our home
I love the fact that gallery walls are so popular.  This is one of my favorite trends and I never get sick of seeing them.  Why?  Because they are so specific to each person.  From the pictures to the knick-knacks, the layout to the style, every gallery wall is unique and representative of the family living in that home.  I love to see how people show their lives in their design and am always surprised at how creative people can be.
Gallery Wall :: Reddy Or Knot
I love when gallery walls match the personality of the owner and contain little snapshots of their lives.  I am definitely not an interior designer nor do I have my perfect Pinterest decor but it is our home and I want it filled with things we love.  Decorating a large space with a gallery wall is also great because it is fluid and can grow and change over time.  I am constantly thinking of what I want to add next and where I will put it.
Gallery Wall - reddyorknot.blogspot.com
Pensacola Gallery Wall
A little peek into our home

Gallery Wall

DIY Instagram Wall Under $25

As soon as I found out our new place was going to have a guest bedroom, I immediately started thinking about how I wanted to decorate it.  I knew I wanted it filled with happy memories and pictures with people who would be visiting.  So of course the first thing that pops into my head is instagram.
Instagram Wall
I put my guest bedroom ideas on hold for a little while to try and unpack boxes.  (I guess unpacking pots and pans so I can cook is more important than decorating lol)  Then I came across this quote on Jordan's blog and was immediately obsessed.  I loved that idea:  I have left my heart in so many places.  Isn't that such a prettier way to think about moving and leaving people and places you love?  I immediately started thinking of all the places and people that I had left a piece of my heart with and knew that this quote needed to be in my guest bedroom!  Since we are renting, I didn't want to put too many holes in the walls so when I saw this project, I knew it was the perfect way to get a lot of pictures up with minimal holes.  I really love how it turned out.
Image and video hosting by TinyPic
Supplies:
20 Square Prints (See step 1 for printing instructions): $2.50 at Wal-Mart
4 Feet Hemp Cord: $3.00 at Wal-Mart
20 Mini Clothespins: $4.00 at Wal-Mart
12x18 Print: $4.50 at Wal-Mart
12x18 Frame: $8.00 at Michael's
Nails (6), Push Pins (4)
Total: $22.00
Step One: Print Square Pictures
I was completely impatient and couldn't wait for instaprints or something similar to print my pictures.  Plus I would hate to pay for shipping for such a minimal cost.  I decided to do a little extra work and just print them at Wal-Mart.  Much cheaper, ready in an hour, and turned out great.
I went to PicMonkey and uploaded a regular 4x6 picture.  (It doesn't matter what the picture is)
Then I went to overlays (5th button down) and added my own overlay.  This is when I chose the square picture that I wanted to print.  I put that straight up against one side of the picture like this:
Image and video hosting by TinyPic
I saved it to my computer and printed the pictures as 4x6s.  When I got the pictures, I just cut the extra side off and had perfect 4x4 square pictures....in one hour for only $.09 a piece.  I printed 20 pictures.
Step Two: Print Quote Print
I loved the original "I have left my heart in so many places" print but the pinks/oranges did not match the room.  I figured it would be easier to just make a new print that would match.  I used this site to create the watercolor map.  I printed this as a 12x18 at Wal-Mart and bought a 12x18 frame at Michael's.
Image and video hosting by TinyPic
Step Three: Assemble Wall
I started by hanging my print in the middle of the wall.  I made sure to leave enough room below for the pictures to hang.  I cut my hemp and tied each end to a push pin, making sure that both lines of hemp were even.  I clipped ten pictures, evenly spaced, to each hemp.  I pinned the bottom and tops rows of pictures about three inches away from the frame, with the frame centered.
I have left my heart in so many places
The best part is when I inevitably find new pictures that I want to add, I can just print them and swap out older pictures!
As soon as I found out our new place was going to have a guest bedroom, I immediately started thinking about how I wanted to decorate it.  I knew I wanted it filled with happy memories and pictures with people who would be visiting.  So of course the first thing that pops into my head is instagram.
Instagram Wall
I put my guest bedroom ideas on hold for a little while to try and unpack boxes.  (I guess unpacking pots and pans so I can cook is more important than decorating lol)  Then I came across this quote on Jordan's blog and was immediately obsessed.  I loved that idea:  I have left my heart in so many places.  Isn't that such a prettier way to think about moving and leaving people and places you love?  I immediately started thinking of all the places and people that I had left a piece of my heart with and knew that this quote needed to be in my guest bedroom!  Since we are renting, I didn't want to put too many holes in the walls so when I saw this project, I knew it was the perfect way to get a lot of pictures up with minimal holes.  I really love how it turned out.
Image and video hosting by TinyPic
Supplies:
20 Square Prints (See step 1 for printing instructions): $2.50 at Wal-Mart
4 Feet Hemp Cord: $3.00 at Wal-Mart
20 Mini Clothespins: $4.00 at Wal-Mart
12x18 Print: $4.50 at Wal-Mart
12x18 Frame: $8.00 at Michael's
Nails (6), Push Pins (4)
Total: $22.00
Step One: Print Square Pictures
I was completely impatient and couldn't wait for instaprints or something similar to print my pictures.  Plus I would hate to pay for shipping for such a minimal cost.  I decided to do a little extra work and just print them at Wal-Mart.  Much cheaper, ready in an hour, and turned out great.
I went to PicMonkey and uploaded a regular 4x6 picture.  (It doesn't matter what the picture is)
Then I went to overlays (5th button down) and added my own overlay.  This is when I chose the square picture that I wanted to print.  I put that straight up against one side of the picture like this:
Image and video hosting by TinyPic
I saved it to my computer and printed the pictures as 4x6s.  When I got the pictures, I just cut the extra side off and had perfect 4x4 square pictures....in one hour for only $.09 a piece.  I printed 20 pictures.
Step Two: Print Quote Print
I loved the original "I have left my heart in so many places" print but the pinks/oranges did not match the room.  I figured it would be easier to just make a new print that would match.  I used this site to create the watercolor map.  I printed this as a 12x18 at Wal-Mart and bought a 12x18 frame at Michael's.
Image and video hosting by TinyPic
Step Three: Assemble Wall
I started by hanging my print in the middle of the wall.  I made sure to leave enough room below for the pictures to hang.  I cut my hemp and tied each end to a push pin, making sure that both lines of hemp were even.  I clipped ten pictures, evenly spaced, to each hemp.  I pinned the bottom and tops rows of pictures about three inches away from the frame, with the frame centered.
I have left my heart in so many places
The best part is when I inevitably find new pictures that I want to add, I can just print them and swap out older pictures!

DIY Instagram Wall Under $25

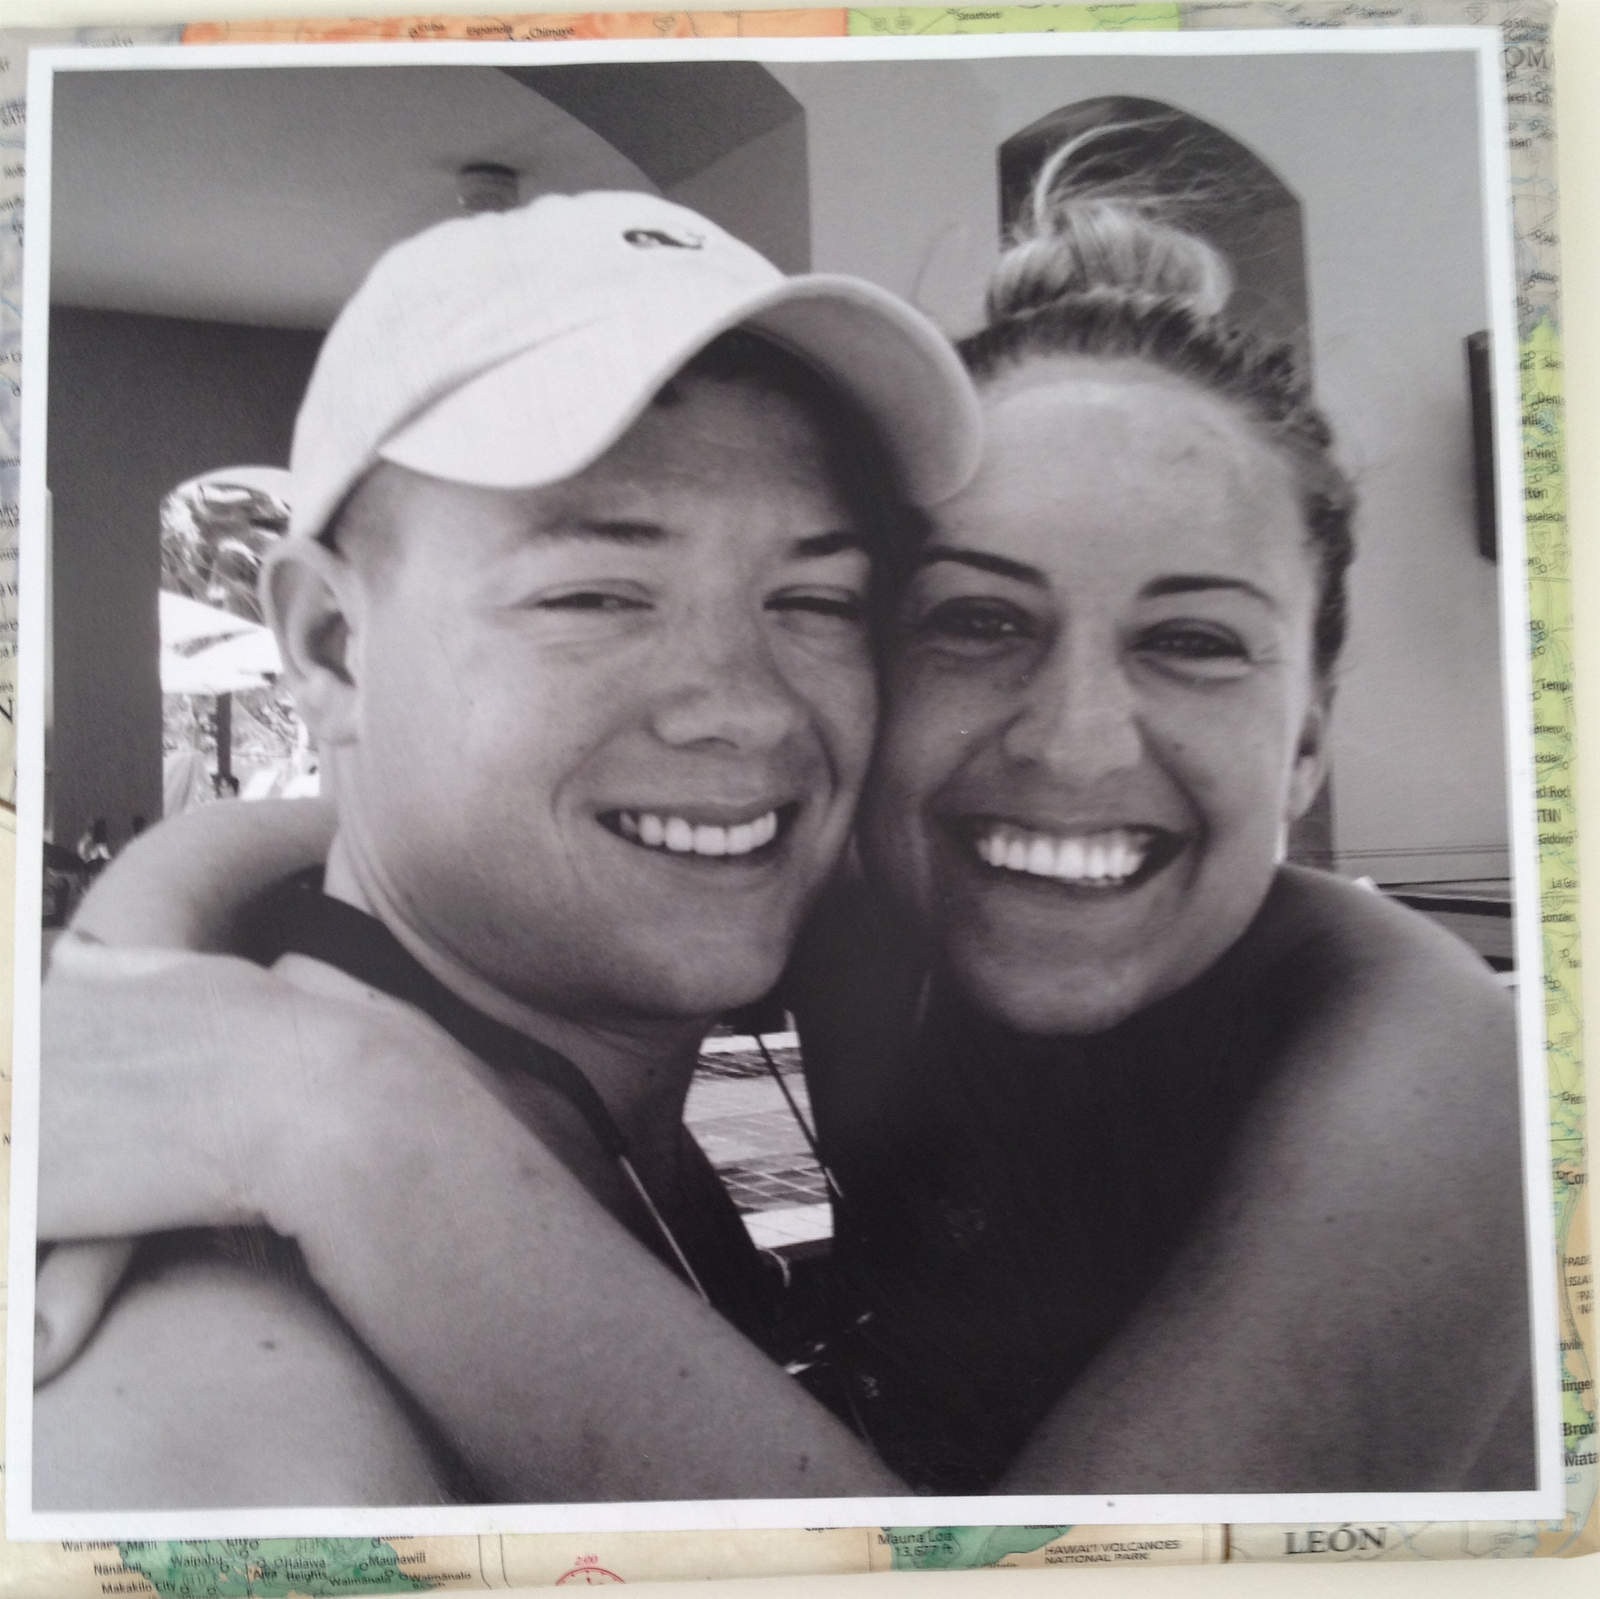
DIY Map Wall Art


I came across the song "Home" by Edward Sharpe and the Magenetic Zeros and I fell in love with it.  Around the same time I was looking for something to decorate this awkward bump out wall above my couch.  Somehow I meshed the two together and I love how it turned out.  They are inexpensive and super light for hanging.  You could also use just about any style photo and quotes to customize your own!


These "canvases" were super easy to create. 

Supplies:
Three 12x12 Canvases (Mine were Artist Loft from Michael's)
Wall Sized Map (I found mine at Staples)
Two 11x11 Photos (B&W prints this size at Staples are like a dollar a piece!)
Black Paint Pen (I used thin tip)
Mod Podge
Spray Adhesive
Stapler

Directions:
Cut squares out of the map big enough to cover the canvas and wrap about the back.  Don't worry about your cutting, you won't be able to see the edges at all.
Spray glue the map to the canvas and wrap like a present.  Staple on back side.  Repeat for all three canvases.
Spray glue one photo on each of two of the canvases. 
Use paint pen to stencil quote, lyrics, words on third canvas.
Cover all three canvases with two layers of mod podge.

Tip:  I am not very good at lettering so I printed out my letters from the computer and then drew them so that I had something to go off of.

I'm happy with how they turned out.  The quote is perfect for us being military because it's so true.  It doesn't matter where we go as long as we are together, that's home.


I came across the song "Home" by Edward Sharpe and the Magenetic Zeros and I fell in love with it.  Around the same time I was looking for something to decorate this awkward bump out wall above my couch.  Somehow I meshed the two together and I love how it turned out.  They are inexpensive and super light for hanging.  You could also use just about any style photo and quotes to customize your own!


These "canvases" were super easy to create. 

Supplies:
Three 12x12 Canvases (Mine were Artist Loft from Michael's)
Wall Sized Map (I found mine at Staples)
Two 11x11 Photos (B&W prints this size at Staples are like a dollar a piece!)
Black Paint Pen (I used thin tip)
Mod Podge
Spray Adhesive
Stapler

Directions:
Cut squares out of the map big enough to cover the canvas and wrap about the back.  Don't worry about your cutting, you won't be able to see the edges at all.
Spray glue the map to the canvas and wrap like a present.  Staple on back side.  Repeat for all three canvases.
Spray glue one photo on each of two of the canvases. 
Use paint pen to stencil quote, lyrics, words on third canvas.
Cover all three canvases with two layers of mod podge.

Tip:  I am not very good at lettering so I printed out my letters from the computer and then drew them so that I had something to go off of.

I'm happy with how they turned out.  The quote is perfect for us being military because it's so true.  It doesn't matter where we go as long as we are together, that's home.

DIY Map Wall Art

Latest Instagrams

© Reddy Or Knot . Design by Fearne.